Saturday, December 15, 2012

Blanket patches stitch


Basic Hand-Embroidery Stitches:

Blanket patches stitch

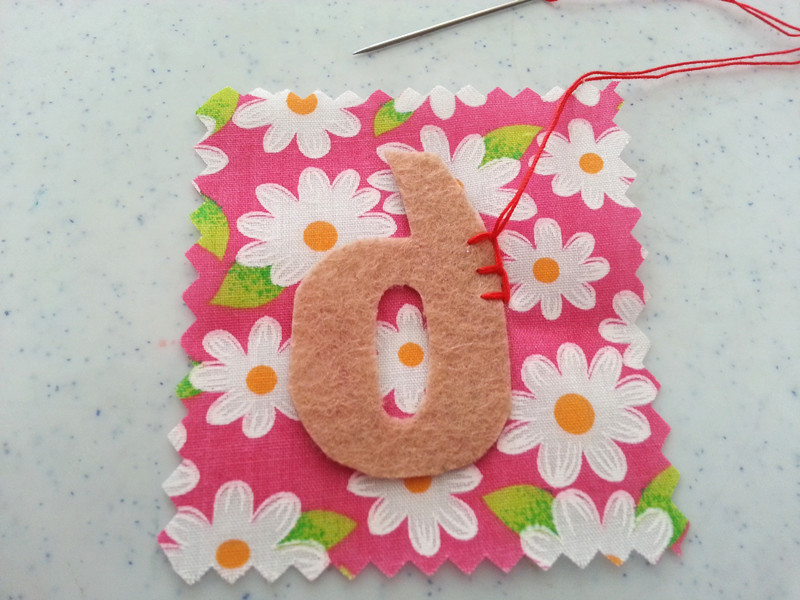
What is blanket stitch patches? Blanket stitch patches is blanket stitch work together with patch stitch. Anywhere this just creates by me, try being some fun with non-woven. This embroidery are no major, just have a look if you suddenly need it for process your felt.

How to do the blanket patches stitch?  Let’s go to try it now~

Material: thread (red), fabric flower, needles, needle scissor, no-woven 
Blanket patches stitch tutorial
basic material

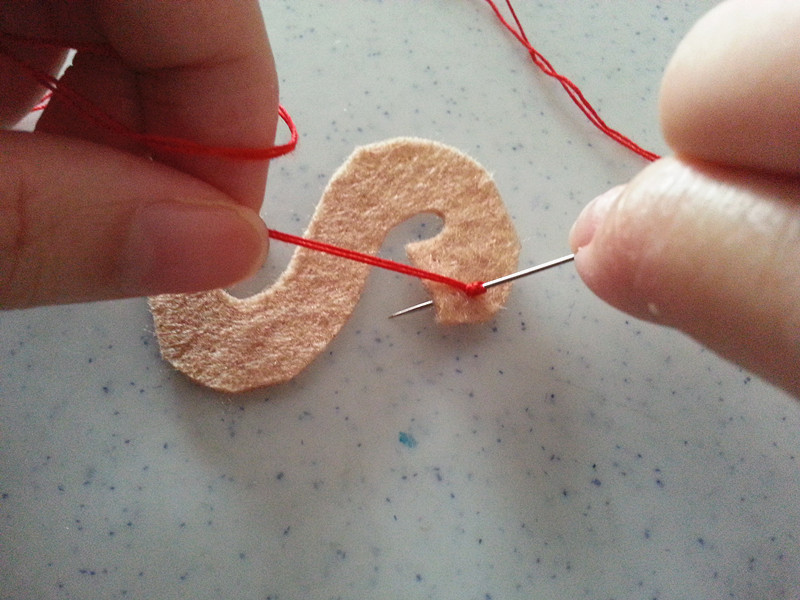
First of all, thread on your needle and knot the thread tail end.  Secondly, just sending your needle up from felt’s back, 
Blanket patches stitch tutorial
needle up from felt back

keep it nicely and soft tight. 
Blanket patches stitch tutorial
pull it nice

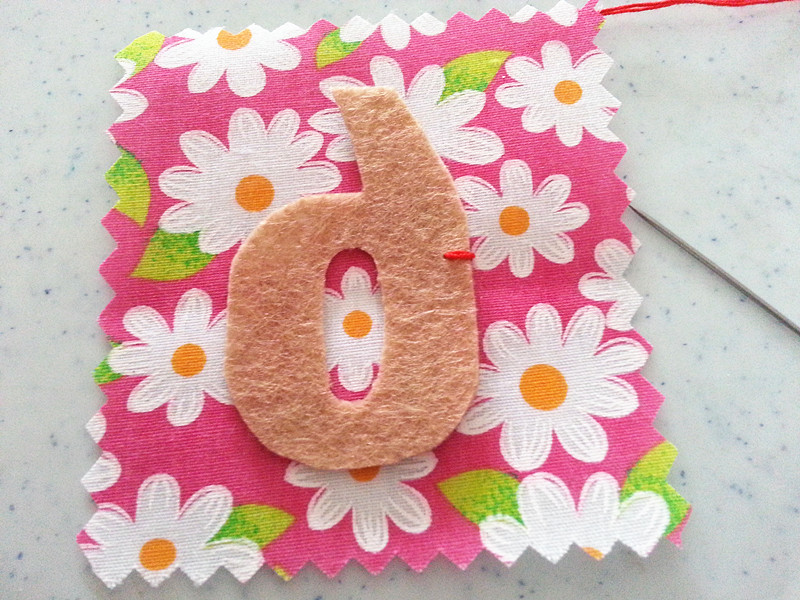
Then sending your needle from the side fronts to the back though the fabric flowers. (As shown on picture)  
Blanket patches stitch tutorial
send needle from fabric's front to back

After that, thread from fabric flowers back to the front, 
Blanket patches stitch tutorial
needle up from back

the point should align with first point of felt up, as picture, pull it tight.

The second stitch start by approximate 5mm distance from first stitch of felt, pull thread down through both piece, 
Blanket patches stitch tutorial
pull thread down through both pieces

no tight it first, leaves a circle. 
Blanket patches stitch tutorial
leave a circle

Now, you just follow the edge of the front piece, insect needle to top. 
Blanket patches stitch tutorial
insect needle to fabric top

Then, before thread come out, put your needle inside the circle. (As show on picture) 
Blanket patches stitch tutorial
needle put inside the circle

At the time thread pulling up, tight it. So the opening stitch has finished. 
Blanket patches stitch tutorial
opening stitch finish

Next, you just repeat second stitch,
Blanket patches stitch tutorial
repeat second stitch

until the end, cut thread off by end with the ending knot.
Blanket patches stitch tutorial
continue until end

Lastly, you just cut the fabric using zigzag scissor, let it look nicely.
Blanket patches stitch tutorial
zigzag scissor

Remark: the distance range should equally same.
Blanket patches stitch tutorial
blanket patches stitch finisheed

Thursday, December 13, 2012

Whip stitching

Basic Hand-Embroidery Stitches:


Whip stitching

What is Whip stitch? Whip stitching can be used to put any seam together. It is not invisible, however it does lay flat if done carefully and is frequently used as a decorative touch. You can also use whipstitches to join two fabrics together.

How to do the Whip stitching?  Let’s go to try it now~

Material: thread (shinning yellow), needles, needle scissor, no-woven
Whip stitching tutorial
basic material

I start with insert the needle up from the middle of back pieces felt to its back.
Whip stitching tutorial
needle up from back piece's back

Secondly, I continue by insect needle from front with distance approximate 5mm length from start point through both pieces, (As shown on picture) keep it tight.
Whip stitching tutorial
distance it and up through both pieces from front

After that, needle come through from front to back and tight it, repeating this process until the end.
Whip stitching tutorial
tight it

Lastly, knot your thread off on the underside of the felt, 
Whip stitching tutorial
continue until the end

 and your stitch is complete.
Whip stitching tutorial
Whip stitching finished

French knot


Basic Hand-Embroidery Stitches:

French knot

What is French knot? French knot in the role of non-woven finished small eyes, small spots, and flowers point, to increase finished three-dimensional sense.

How to do the French knot?  How to make the knot big plump? There are two ways: 1) multi wrapped around a few laps line (not to exceed 4 laps) 2) the number of shares may be appropriate to increase the line, but only wrapped around a twice.  Let’s show you the way.

Material: thread (red), needles, needle scissor, no-woven
french knot tutorial
basic material

Firstly, thread on your needle and knot the thread tail end. Then, bring your needle through to the front of no-woven,
french knot tutorial
needle through to front

Pull enough thread through it, so that you can point the needle back at the thread. 
french knot tutorial
 have enough thread

Bring your needle to the right side where you want to make your knot. Hold the thread near to the felt and wrap the thread around the end of your needle once and pull it tight. Then wrap the thread around the needle a second time.  
french knot tutorial
wrap thread around needle twice

Then, Hold the needle and thread firmly, but not too tightly so that the loops tuck up snug around the needle.
french knot tutorial
hold needle and thread firmly

Now, just hold and re-insert the needle back to the same spot (exit point).
french knot tutorial
re-insert to point come out

In the meanwhile, left hand slowly pulls the thread down to the exit point. (As picture)
french knot tutorial
slowly pull down

So the needle slowly down through the non-woven.
french knot tutorial
needle slowly down

Once the needle has been pulled all the way through, let go of the thread and pull the rest of the loop of thread down through the knot.
french knot tutorial
hold the thread by left hand until it completely pull down

The knot should stay close to the fabric and keep nice and tight.
french knot tutorial
keep tight

Lastly, just adjust the knot and cut the thread to finish the stitch.
french knot tutorial
french knot finished


Running stitch


Basic Hand-Embroidery Stitches:

Running stitch

What is Running stitch? The running stitch or straight stitch is the basic stitch in hand-sewing and embroidery, on which all other forms of sewing are based. Straight stitch usually used to do some ordinary suture, pleating, and border. The distance is generally maintained equally size at about 3-4 mm.

How to do the Running stitch? Let’s go to try it now~

Material: thread (shinning yellow), needles, needle scissor, no-woven
running stitch tutorial
basic material

Basically, thread a needle and tie a knot in the end of the thread (always same) before start every stitch. Then start by sending your needle from back to the top though the no-woven, and push it tight.
running stitch tutorial
needle pull from back

After that, poke the needle back down through the felt next to where you just came up, 
back down

and pull the thread down into your first stitch.
running stitch tutorial
first stitch


Now leave some distance to continue next stitch (usually approximately 5mm), so just repeat the first stitch poking your needle up through the no-woven.
running stitch tutorial
repeat by same distance stitch


Remark: try to have a fix distance, so it looks into a straight line.
running stitch tutorial
look like a straight line

So just remand your stitching length until the end.
running stitch tutorial
continue steps until the end

Lastly, knot your thread off on the underside of the felt, and your stitch is complete. 
running stitch tutorial
running stitch finished


Wednesday, December 12, 2012

Back stitch


Basic Hand-Embroidery Stitches:

Back stitch

What is Back stitch? Back stitch or Backstitch and this is similar to machine sewing, but most strong of a hand-stitched, in life, we will be using this method in non-woven finished most cases to seaming a pretty pattern. It comes with two strands (double threads) through a needle to sew pattern folded into four strands (four threads).The more obvious lines, thereby allowing the pattern to look more three-dimensional and beautiful. Requirements: need align between the cross are straight, can’t see the hole between, line should be uniform and neat.

How to do the back stitch? Let’s go to try it now~

Material: thread (red), needles, needle scissor, no-woven
back stitch
basic material

Firstly, thread a needle and tie a knot in the end of the thread. Begin by pull the thread out from bottom piece up to top so that the knot lies against the felt. 
back stitch tutorial
bottom up to top

Secondly, bring the needle down approximately 1/2-cm away from where you went up.
back stitch tutorial
needle 5mm range then down

Pull the thread through. 
back stitch tutorial
pull the thread down

Then send your needle up and control the stitch length same as first stitch.
back stitch tutorial
needle up and control length

Hereafter, you need to take attention by put the needle back down in the same spot you did before.
back stitch tutorial
needle back down

Just repeat this pattern of stitching and you are good to go.
back stitch tutorial
second back stitch
start 3rd stitch.
back stitch tutorial
third back stitch

So, just continue each stitch step by step then you will finish on your way. 
back stitch tutorial
continue the steps until the end

Reminded, you always put the needle back down in the same spot you did on previous stitch, so nothing difficult on backstitch again.
back stitch tutorial
back stitch finished


Patch stitch

Basic Hand-Embroidery Stitches:

Patch stitch

What is Patch stitch? The patch pattern most of them are located in the upper layer of the background fabric. We often see non-woven finished with many beautiful protruding patterns (a person or animal or plant) is using the patch sewn.

How to do the Patch stitch? Let’s go to try it now~

Material: thread (brown), needles, needle scissor, felt
patch stitch tutorial
basic material

Firstly, thread on your needle and knot the thread tail end. Start by sending your needle up from the back and end at side of the top piece. (As shown at the picture)  
patch stitch tutorial
needle up from back

Then send your needle from top to bottom, directly through the two pieces. This should be done about 1/4" in from the edge, or at whatever length you want your stitches to be. First stitch finished by pulling this stitch tight.
patch stitch tutorial
top to bottom through both pieces

Afterwards, adjust the second length 
patch stitch tutorial
try second stitch(repeated)

and repeat the step needle up from the back until no end.
patch stitch tutorial
continue the steps until the end

Lastly, knot your thread off on the underside of the felt, and your stitch is complete.
patch stitch tutorial
finish my patch stitch